
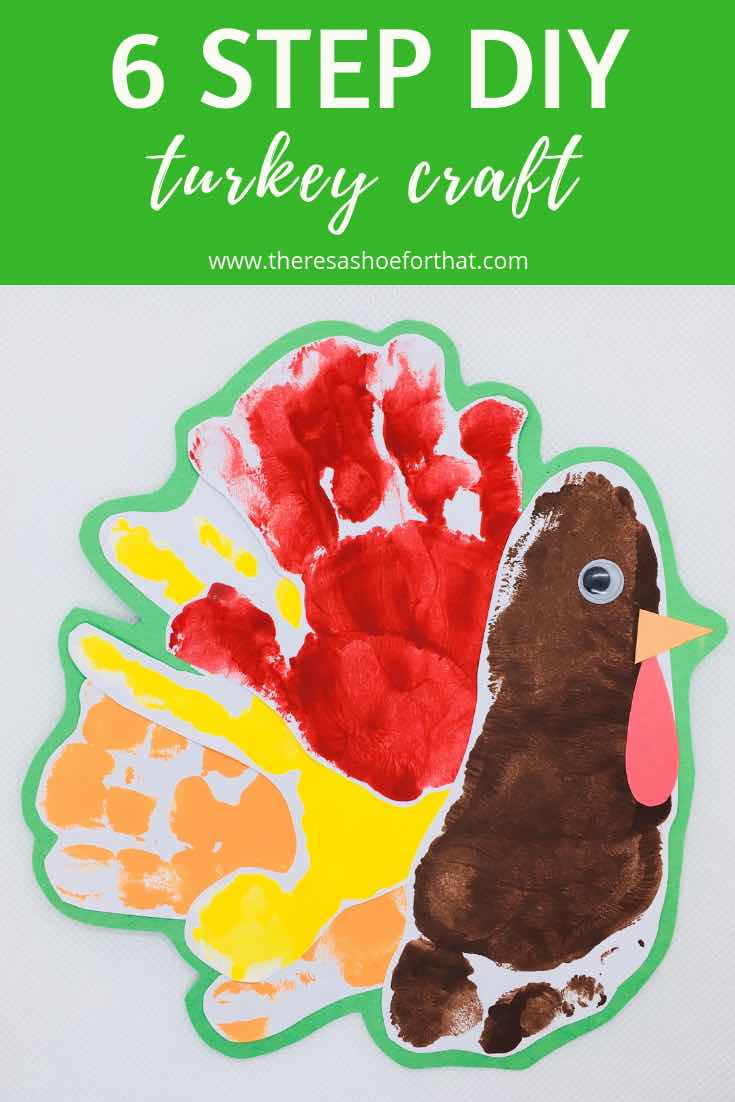
I have tried time and time again to get the perfect hand print/foot print craft created with Little Dude with absolutely no success… until now! I’m not sure why it took me so long to think of a cut and paste option to obstaining multiple hand prints in different colors on one craft, but finally we have created a successful holiday craft.
Like most of you, I searched Pinterest for ideas to try and find something that might actually work. As I mentioned, I have tried MANY Pinterest crafts that look amazing online but haven’t worked when I tried it. When I saw this Turkey craft a light bulb came on and I knew it was something Little Dude and I could tackle as long as I was prepared in advance.
I think that is they key to success and why daycare is able to send home such awesome craft projects all the time – they prepare the items, colors and papers BEFORE the toddler is invited to join in on the crafting.

What you need:
- Paint
- Paint table cloth for the floor
- Paper
- A paint brush
- Wipes/paper towel
- Construction paper
- Eyes
- Glue
- Scissors
Step 1 – Set Up
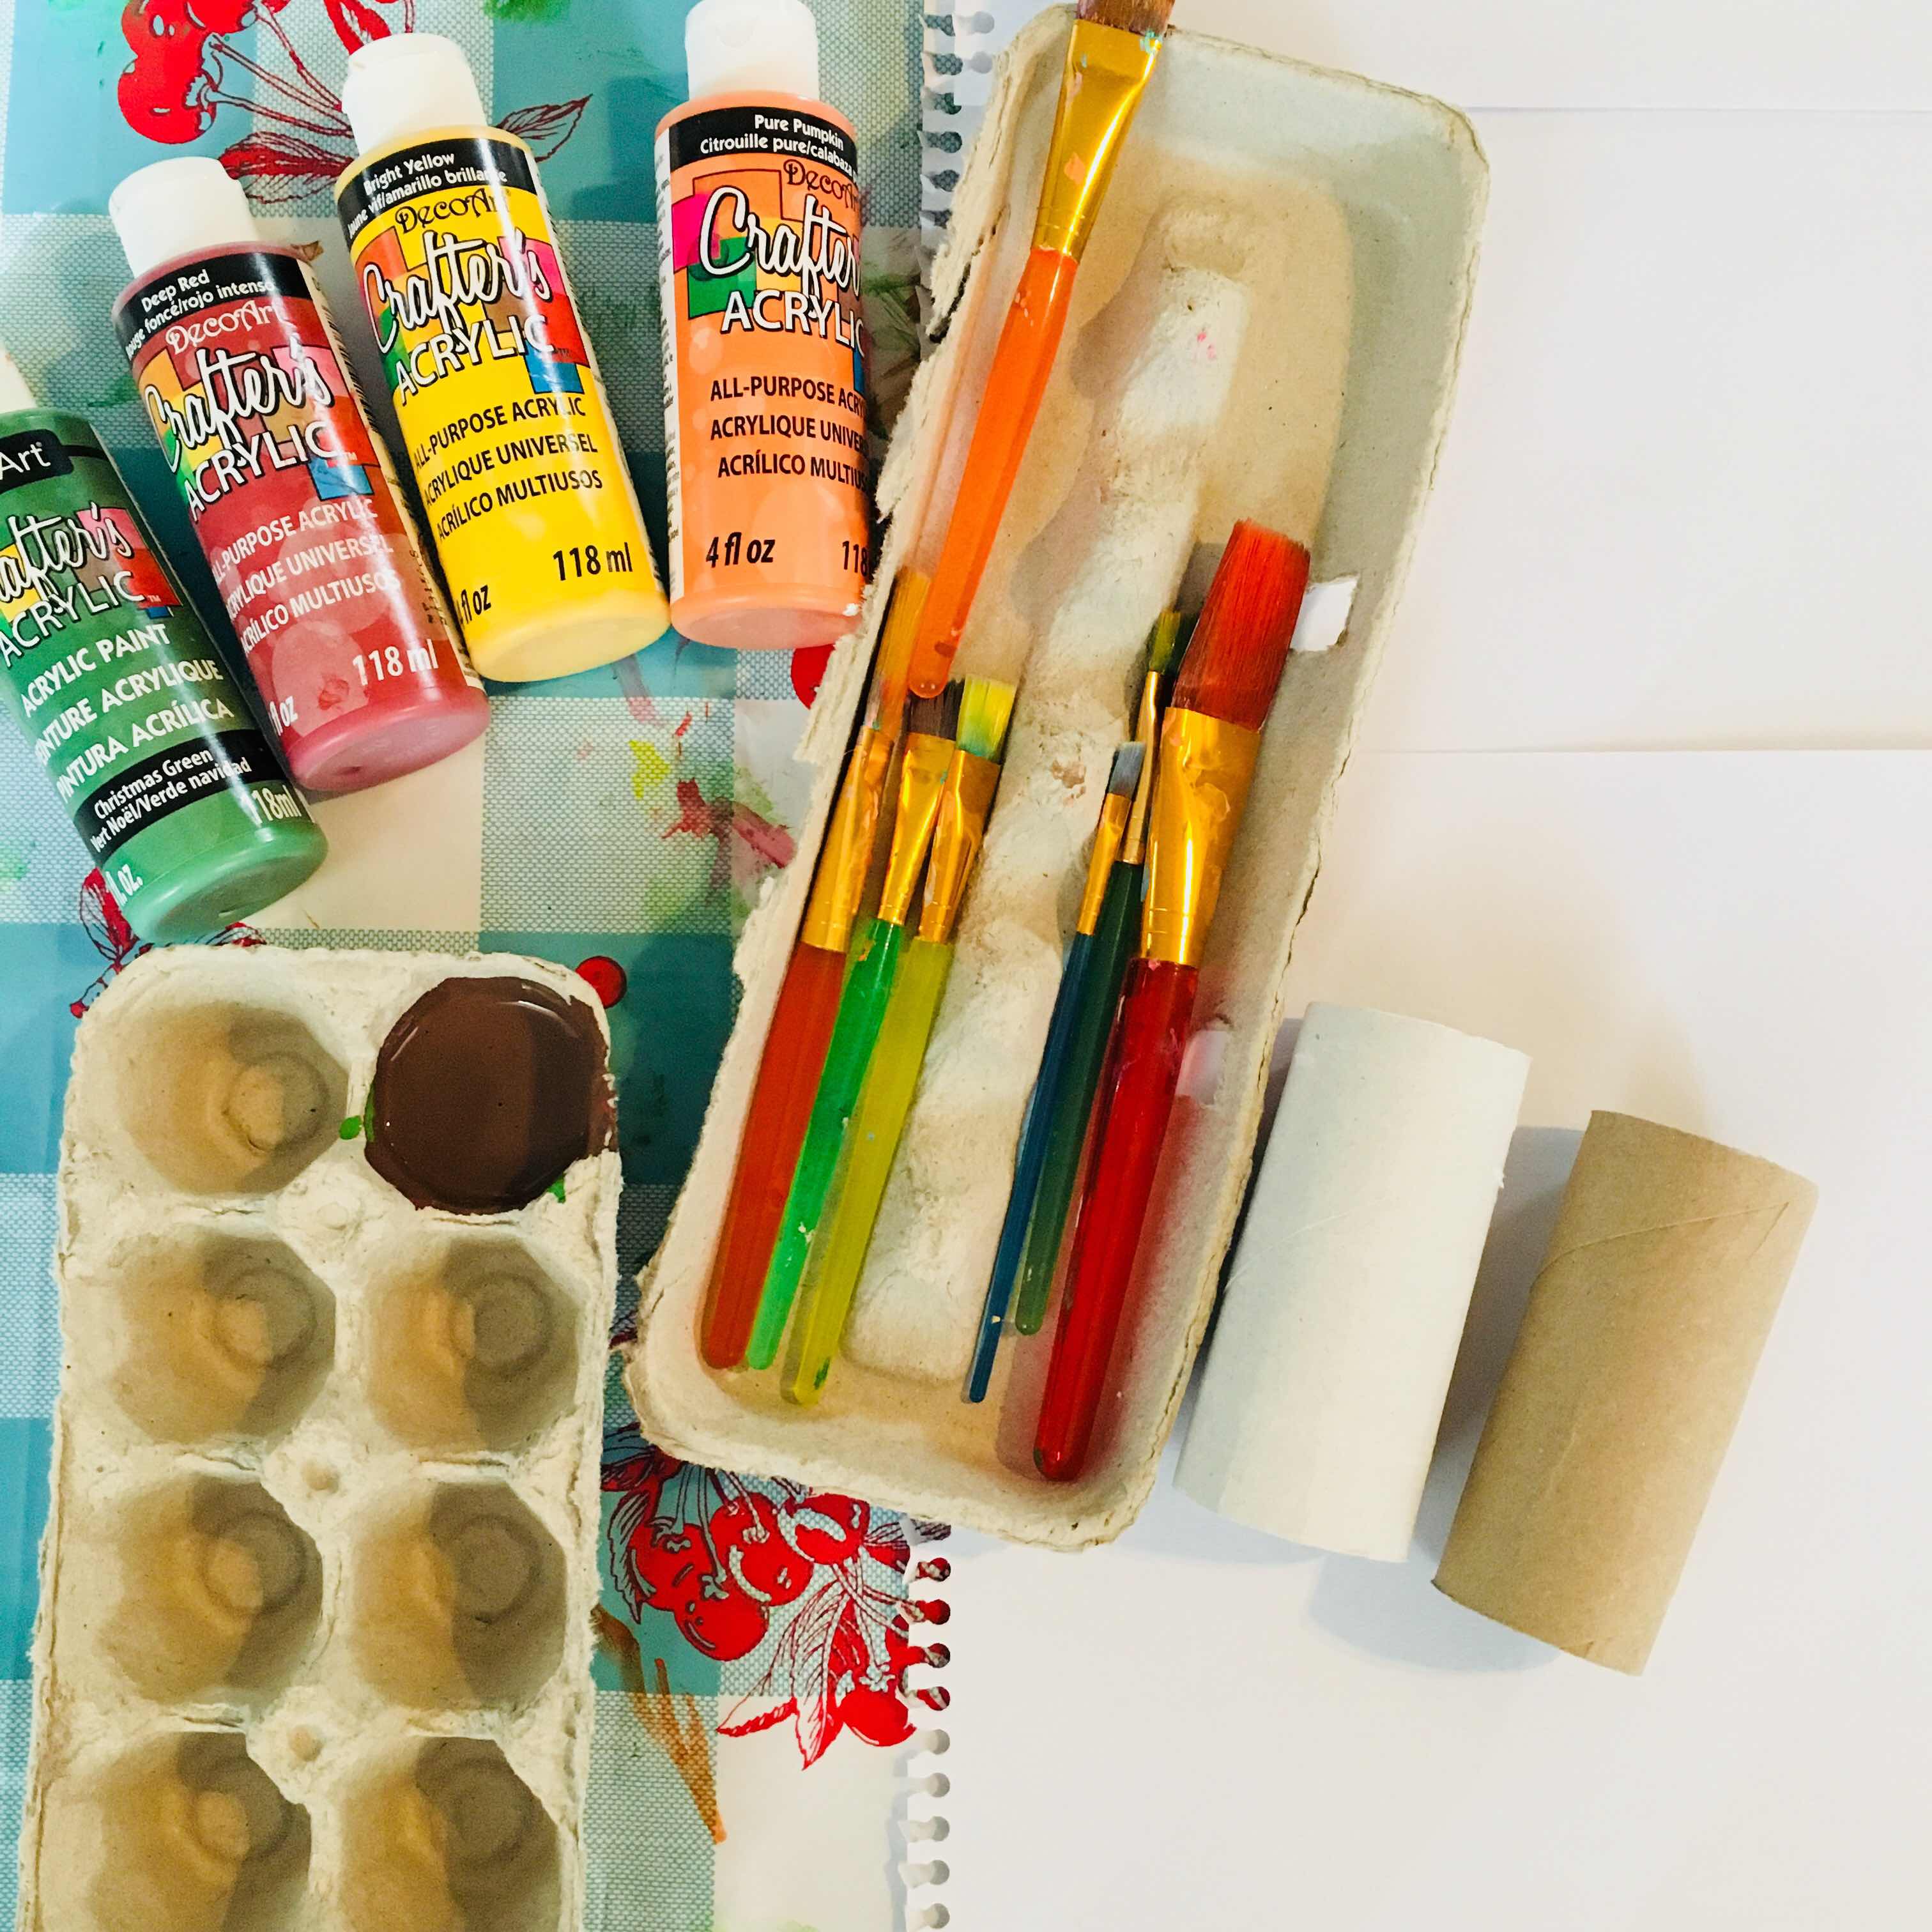
As much as you may be tempted to include your little one in every step of the way, go this part alone! I didn’t have brown paint so I pre-mixed the brown (by mixing green and red together) in an empty egg carton for ease of clean up afterwards, I put out four large sheets of white paper that we would use for the hand prints and foot prints (1 page for each colour) and had the paint brush ready for us to paint Little Dude’s foot and hand. Note: All the supplies were on top of a table cloth that we now use as our “painting mat” in order to avoid paint all over the floor.
The toilet paper rolls were for a separate project we started that day where I would also need brown paint… I was trying to be efficient and only mix the brown paint once for Thanksgiving Day crafts 🙂
I only added the colour we were going to use as we needed it to the egg carton so Little Dude wouldn’t be tempted to make red foot prints etc.
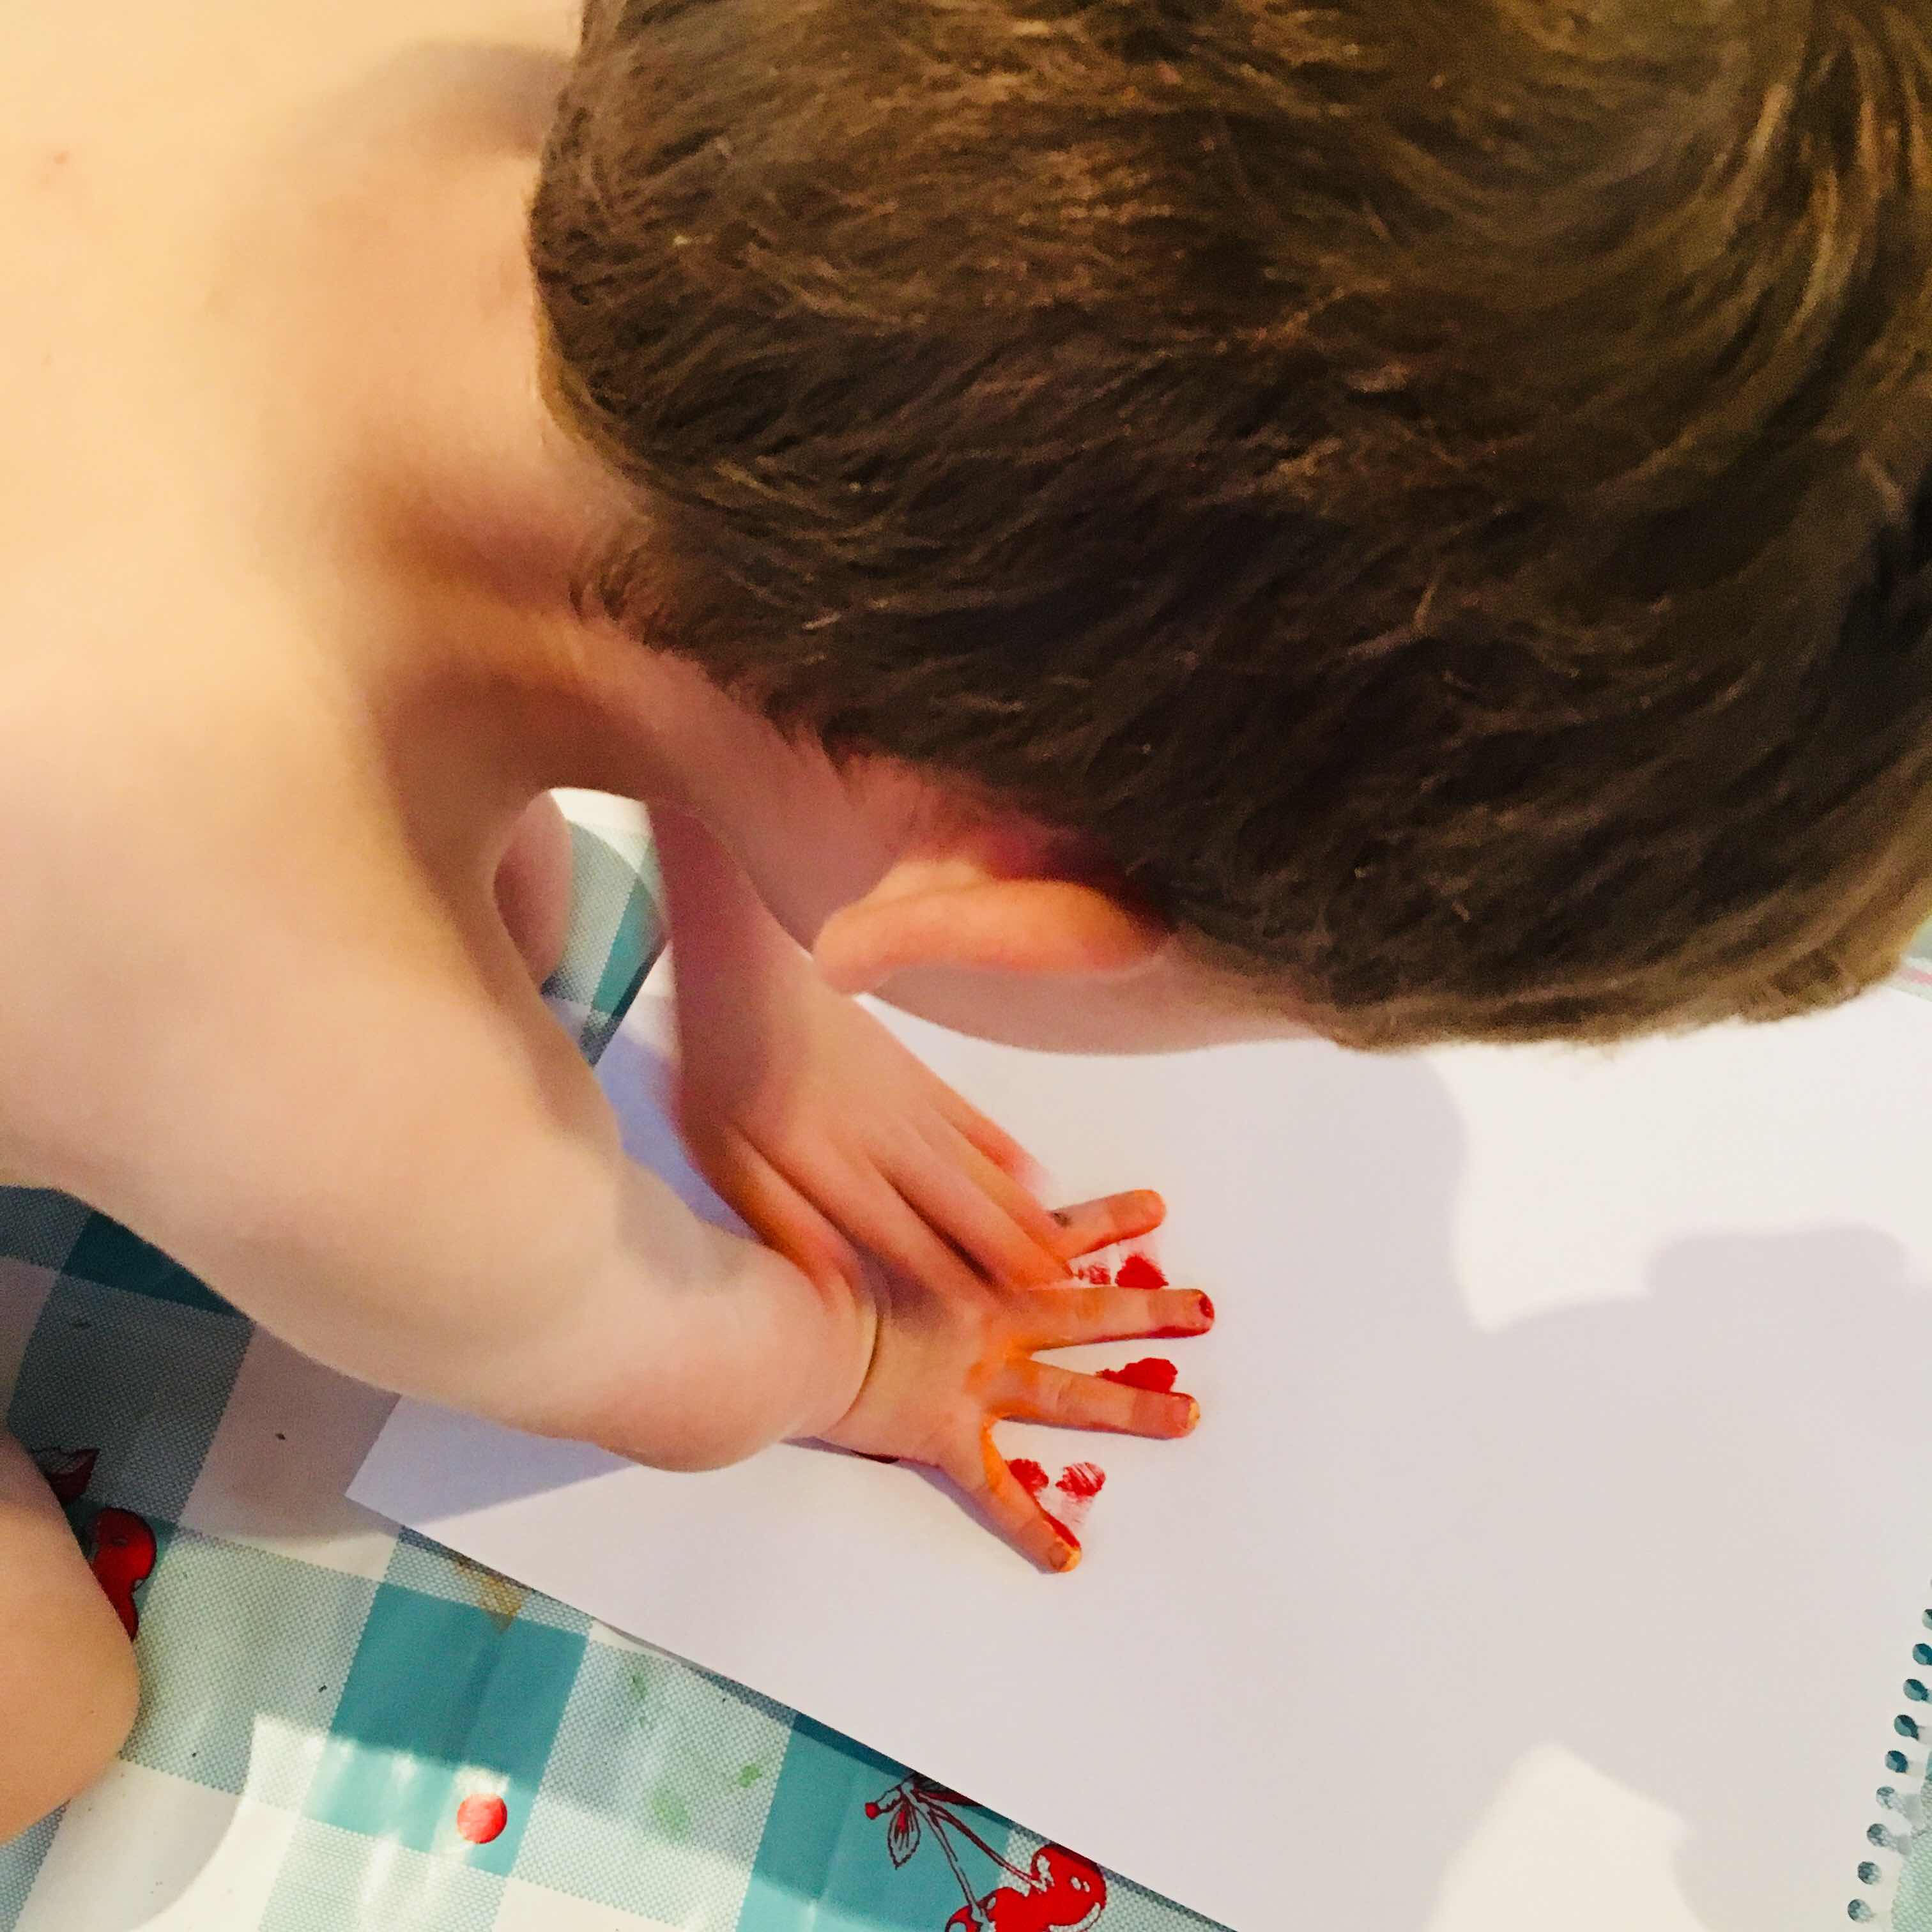
Step 2 – Hand and Foot Prints
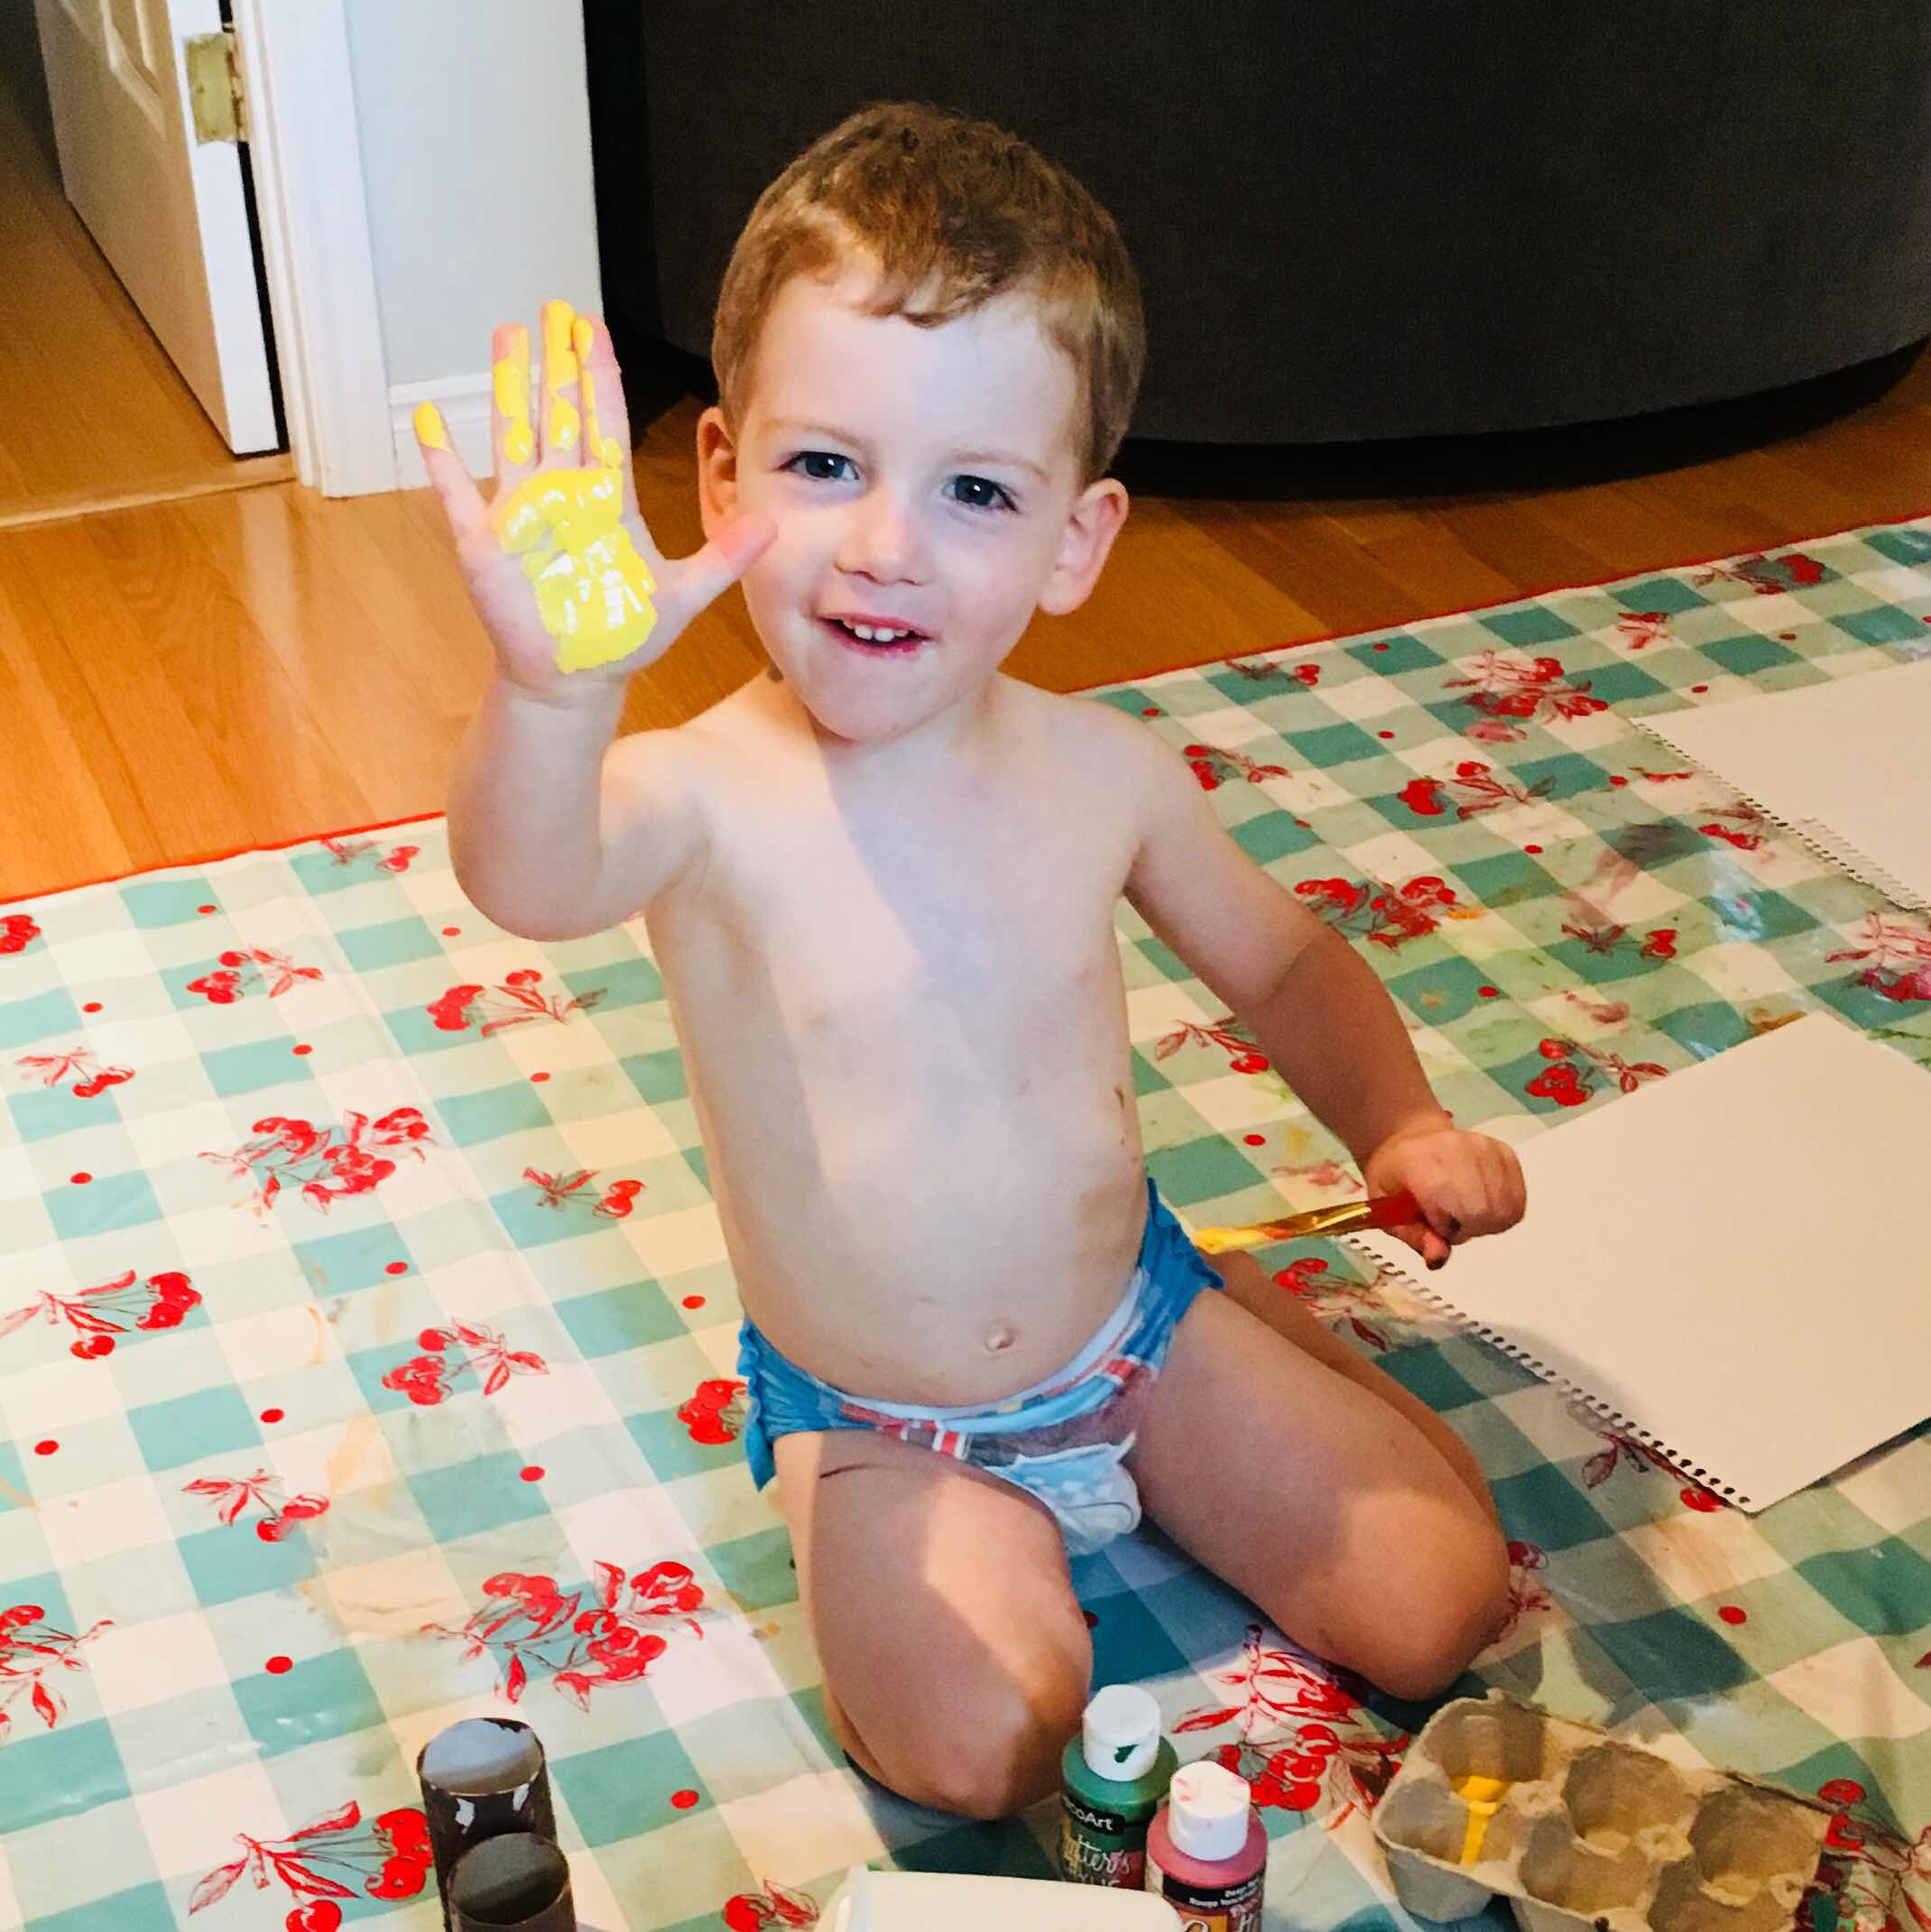
We started with painting the toilet paper rolls (again, this was for a different craft) and then did his foot print first. It was hilarious since his feet are ticklish – he laughed hysterically through me painting his foot and thought it was the funniest thing ever.
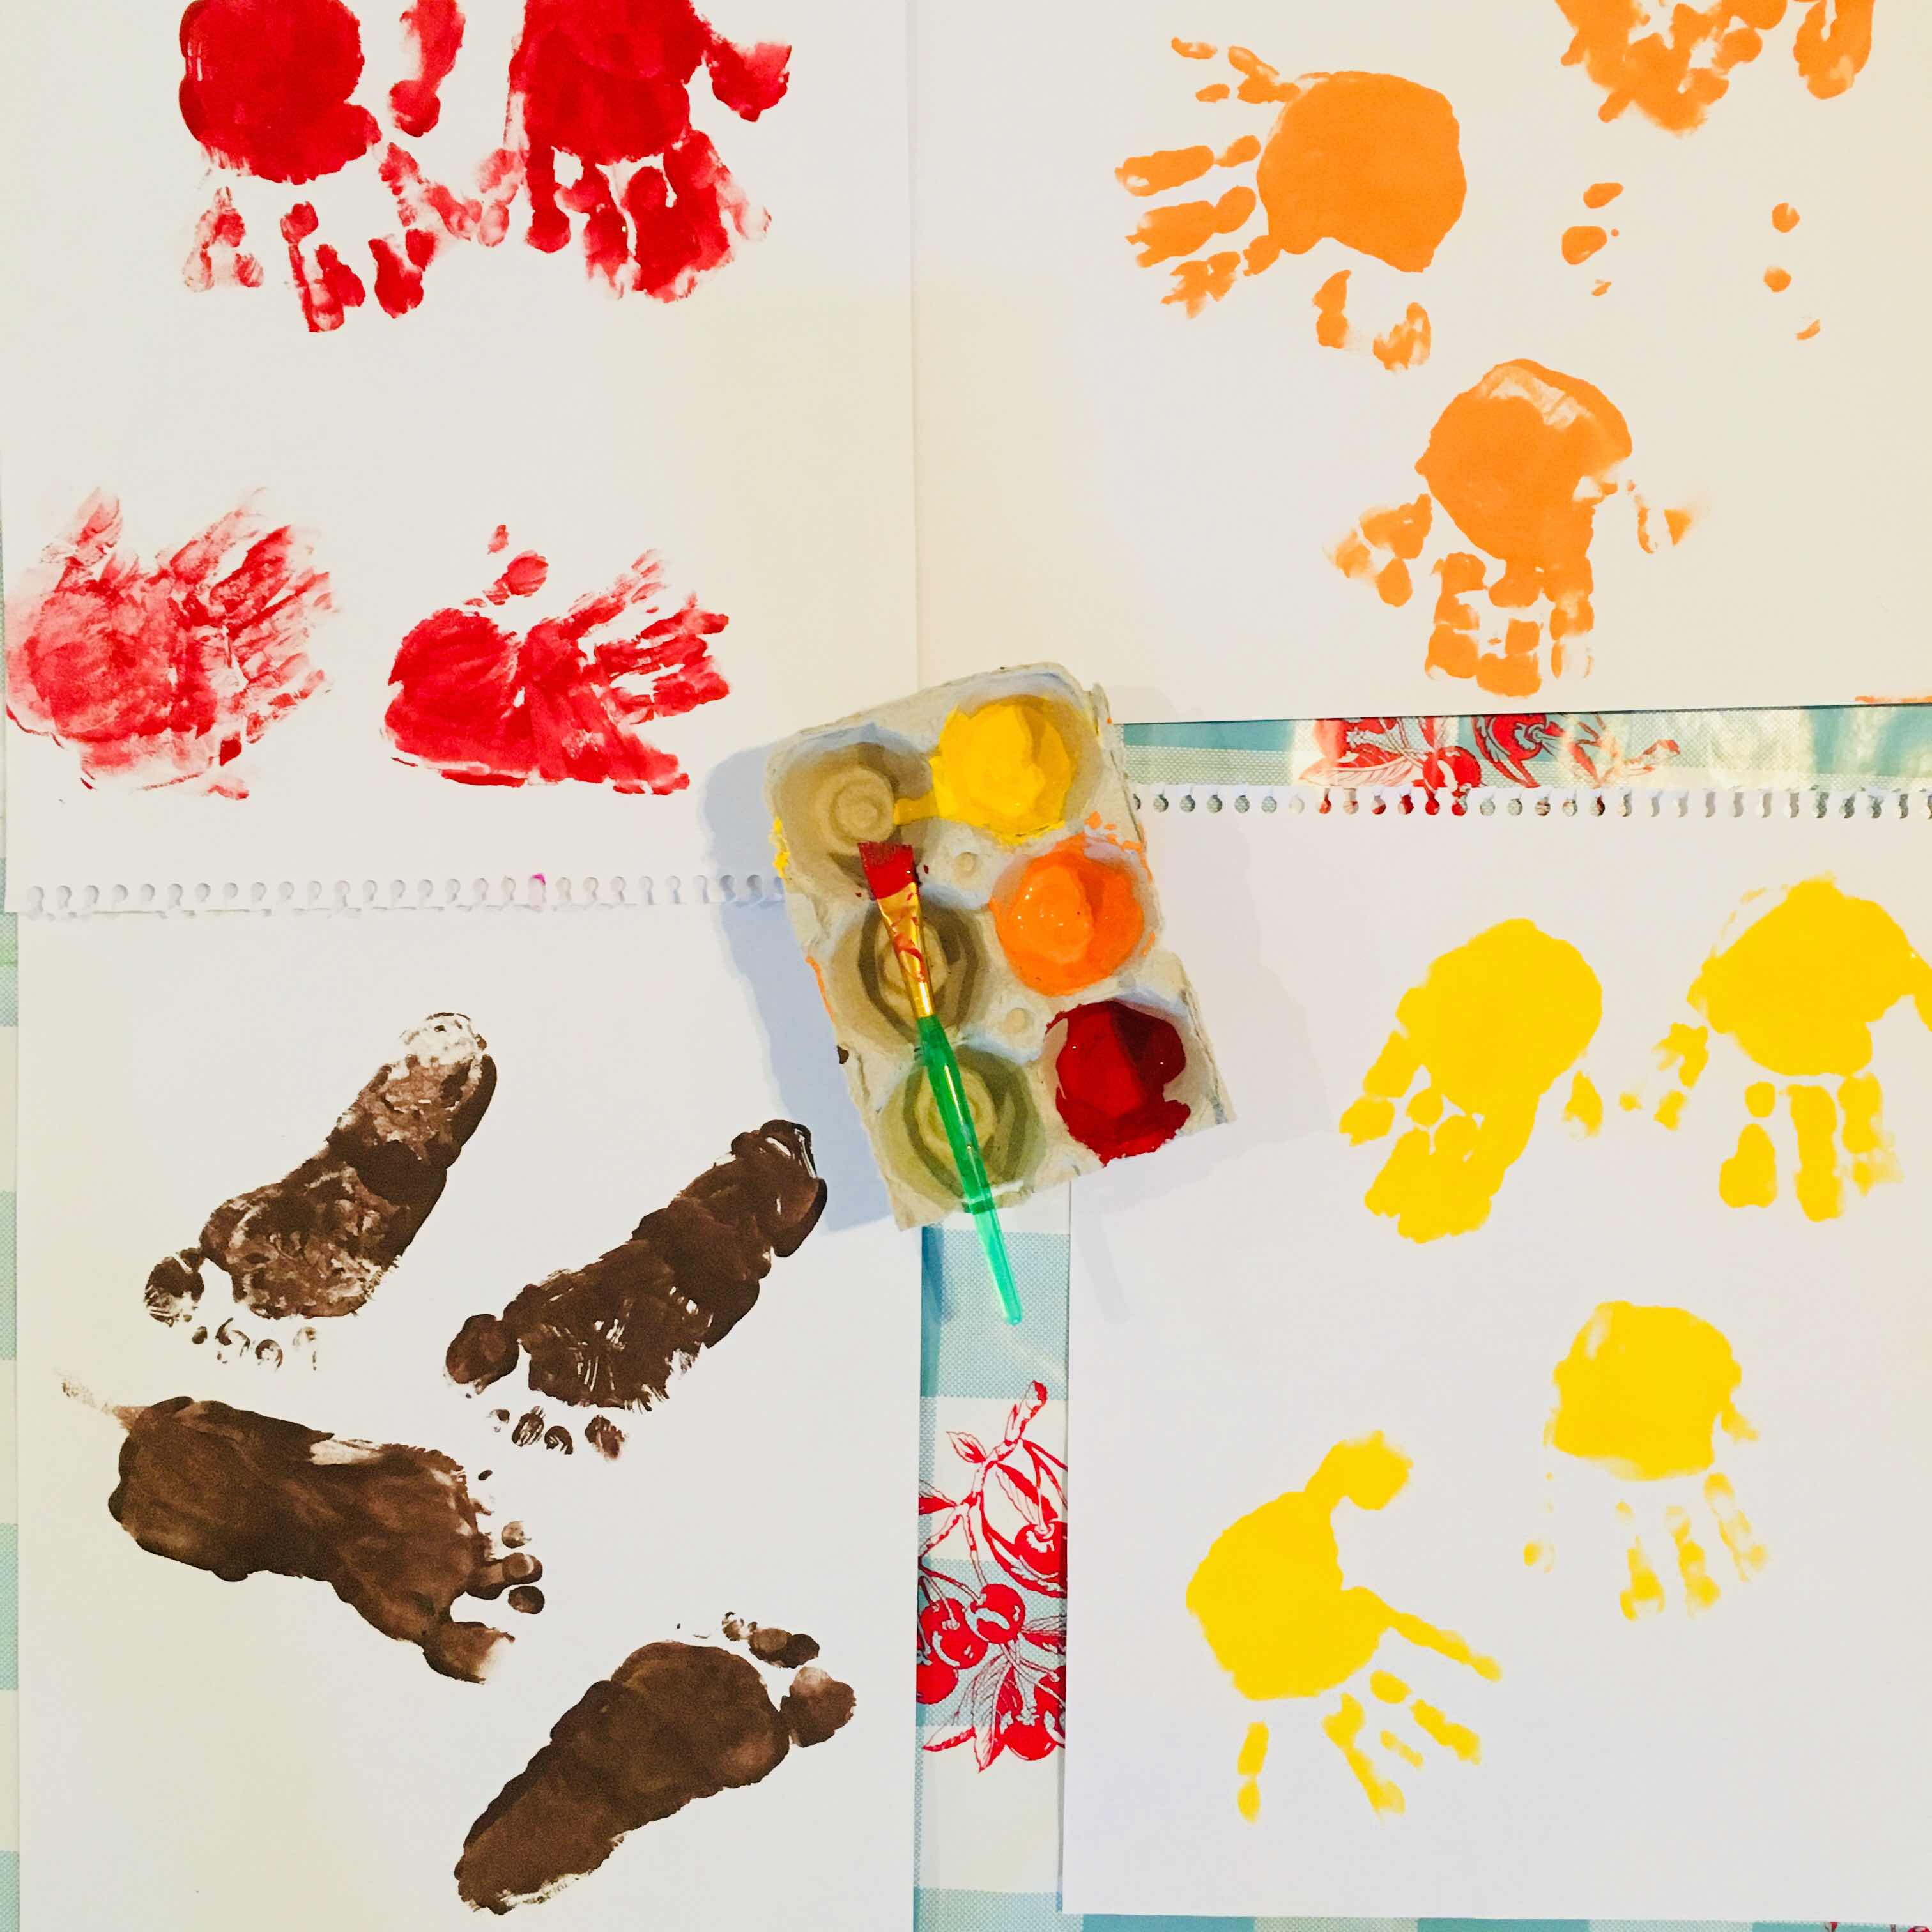
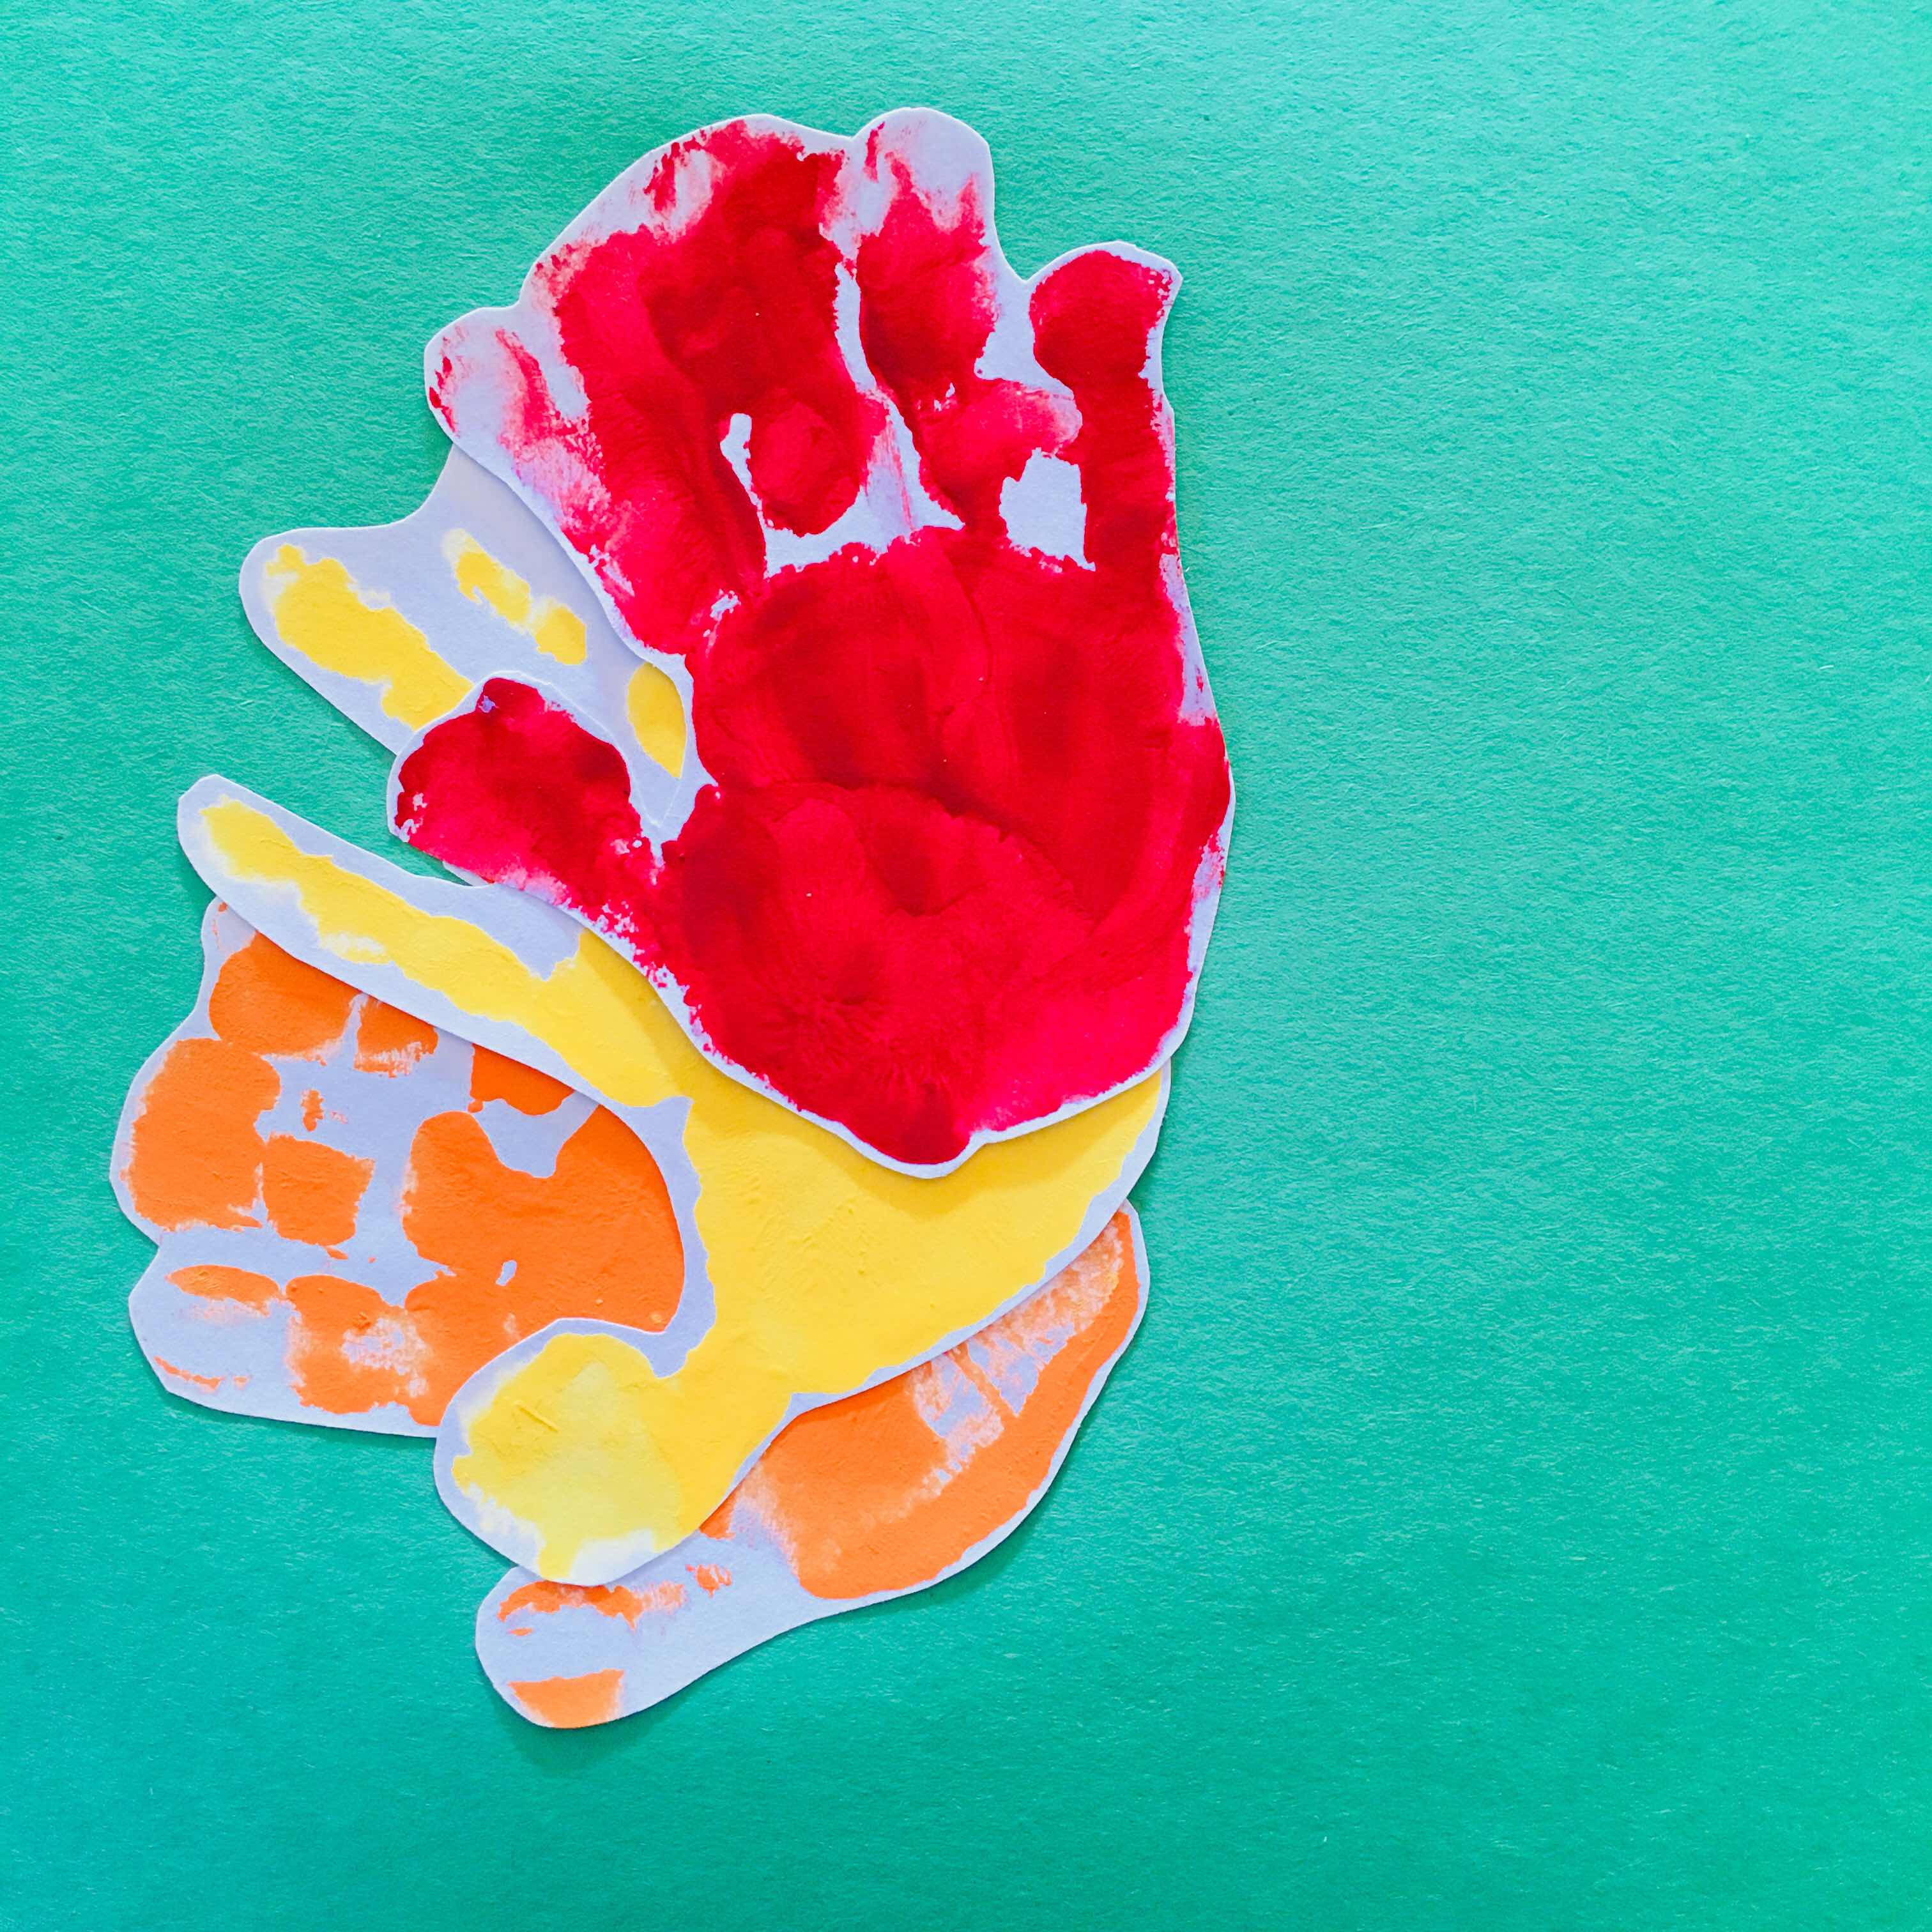
After we cleaned up his foot from the brown paint (with a wipe and paper towel) we moved on to hand prints. I suggest starting with the lights colour and moving on to the darker colours afterward in order to not hand the darker colours affect the lighter ones. We started with yellow, then orange and finished with the red.
My goal was to end up with 3 turkeys so we made four of each colour print (including his foot print in brown) in case one didn’t work out. Even though this was a fun activity it was also a good teachable moment using colours, counting and practicing patience (for both of us, haha).
Step 3 – Let Everything Dry & Clean Up
You would have noticed in the previous pictures Little Dude was wearing only a pull-up… it makes life way easier to just put hm in the bath afterwards and dispose of the pull-up rather than trying to get paint off of clothes.
I used the time it took for everything to dry for Little Dude to have a bath and get ready for bed (since we did this project after dinner one evening). We then completed the project the next day.
Step 4 – Cut Out Hand & Foot Prints
 I did this part on my own and put out the prints to have an idea of how they would look glued together on the construction paper… I was anxious to see if this craft was actually going to work for us! Unless you have a really skilled toddler when it comes to cutting (and safe scissors for a little one to use) I would recommend this step as an adult only step.
Step 5 – Glue & Assemble the Turkeys
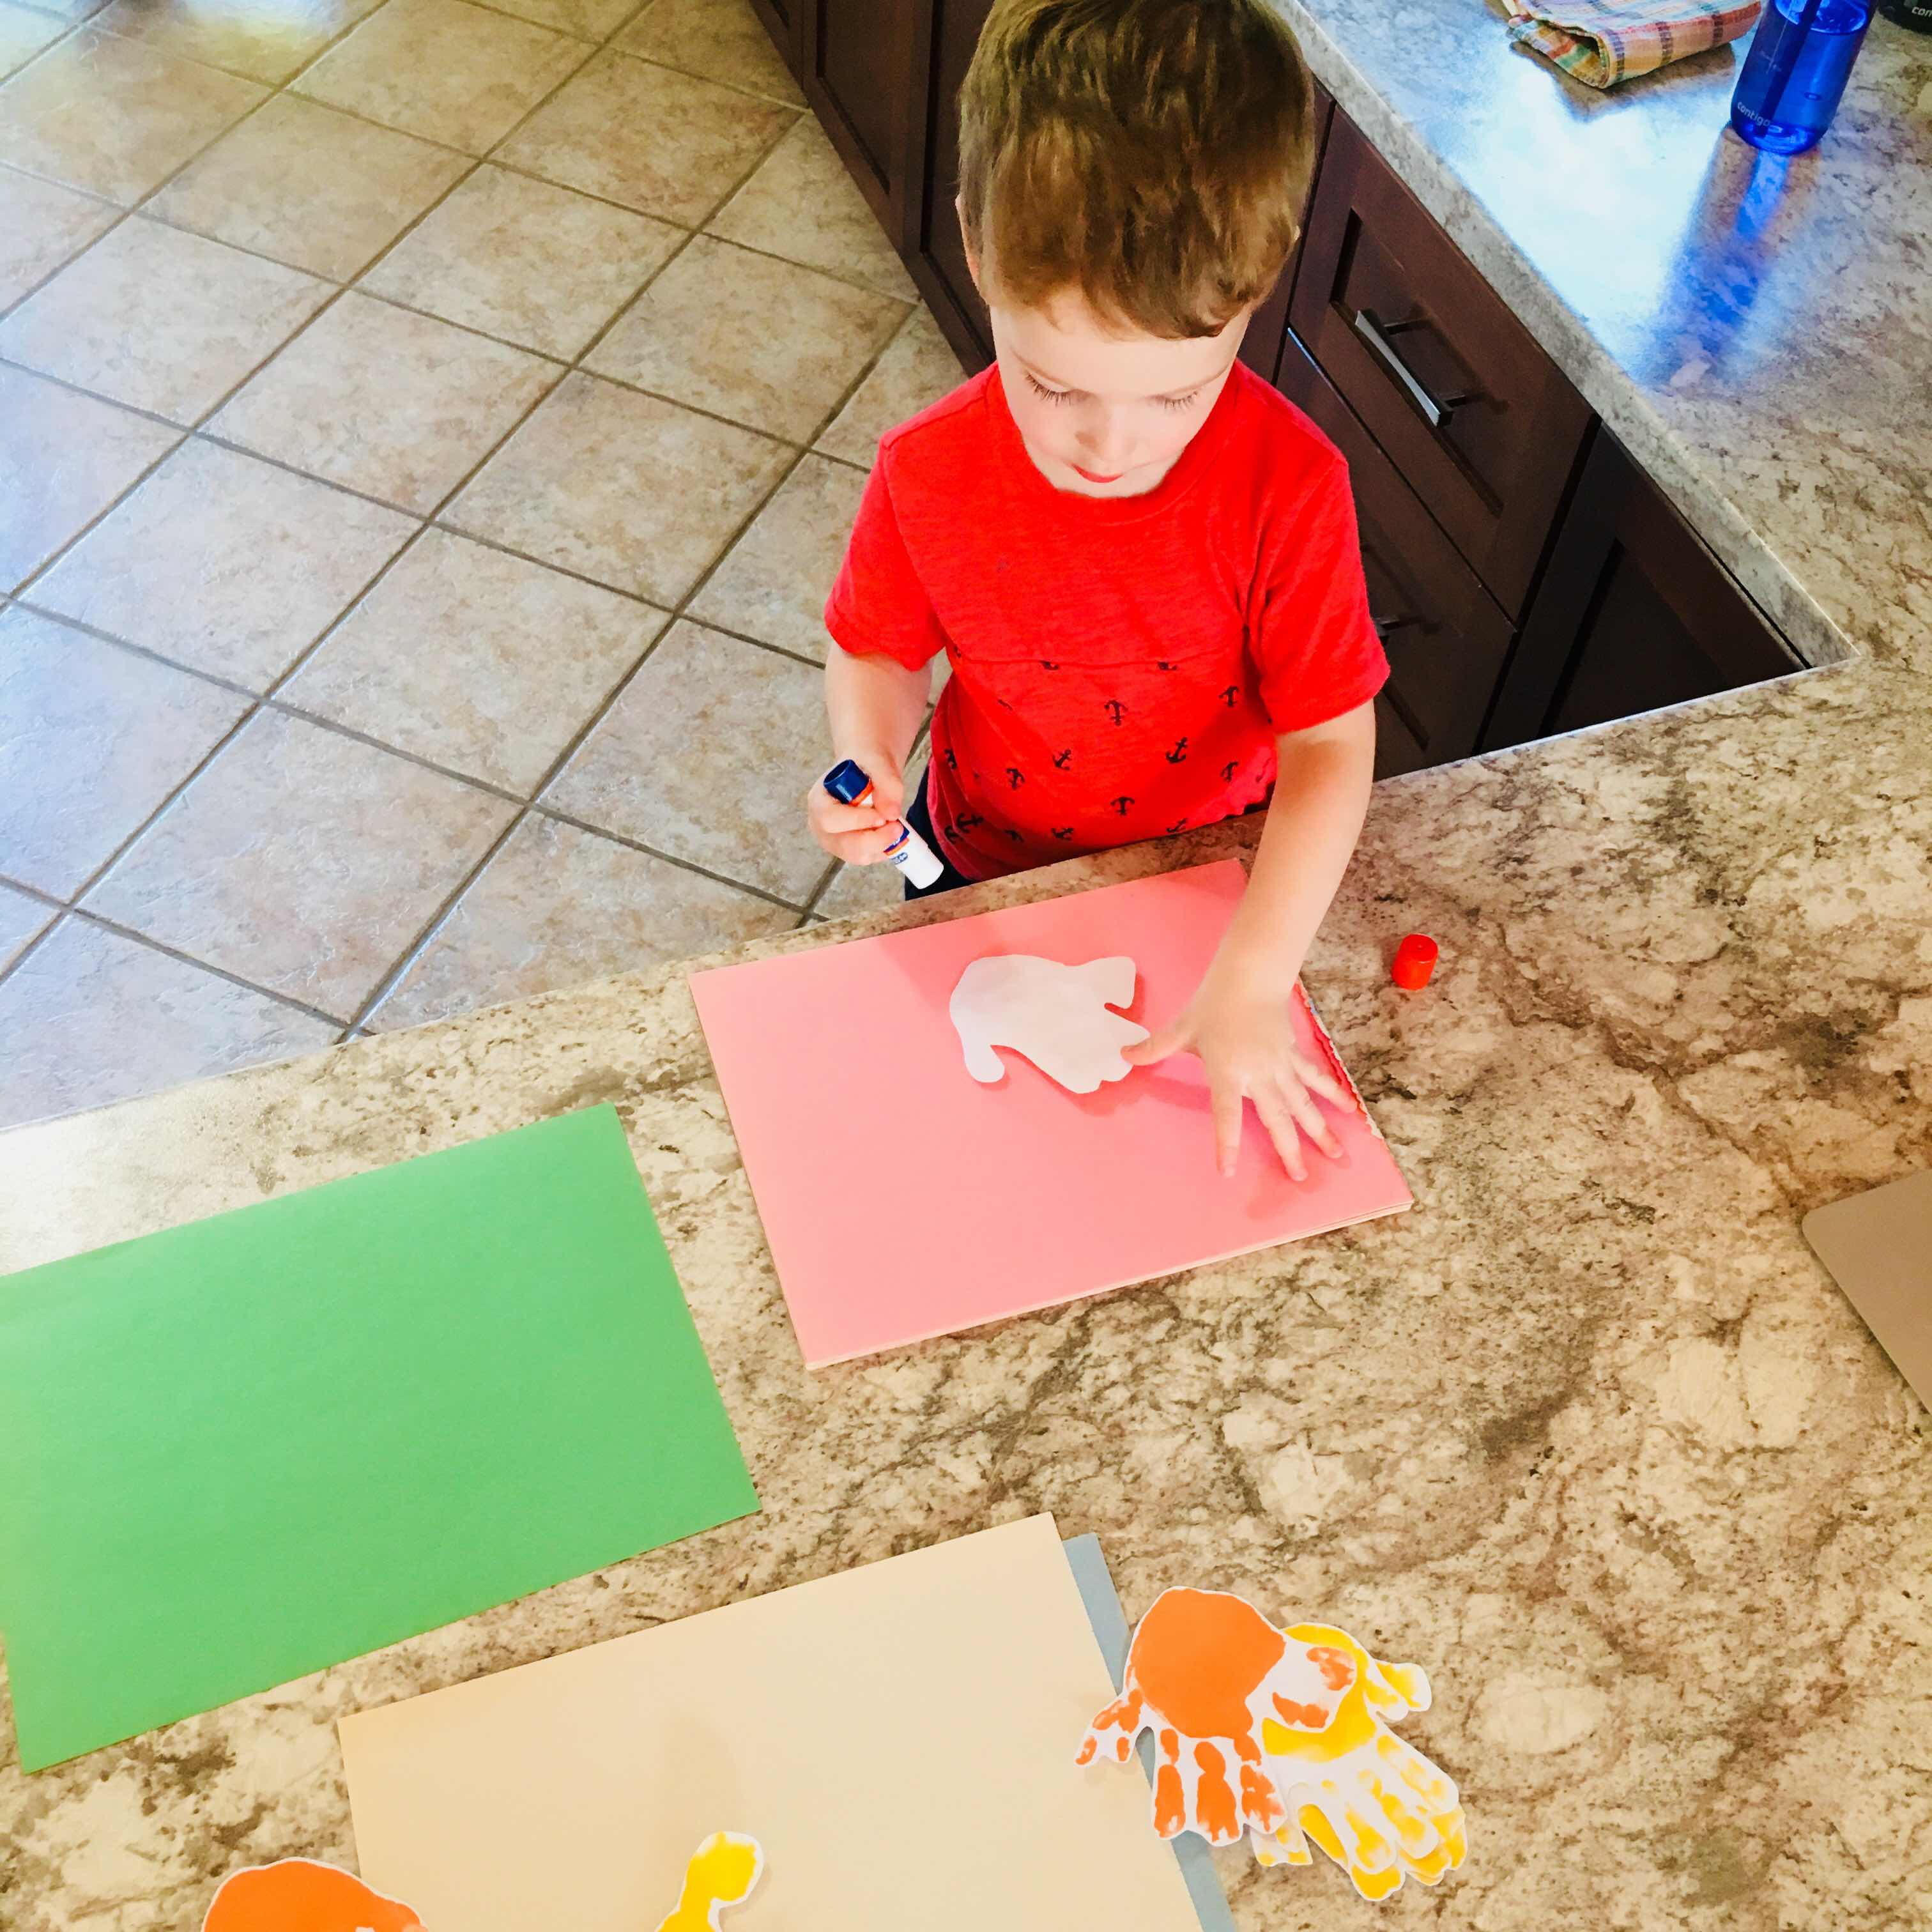
We worked as a team for the final assembly. Little Dude was in charge of putting glue on all the hand prints and foot prints that I had cut out and then I placed them on a sheet of construction paper for him to press down and secure in place.
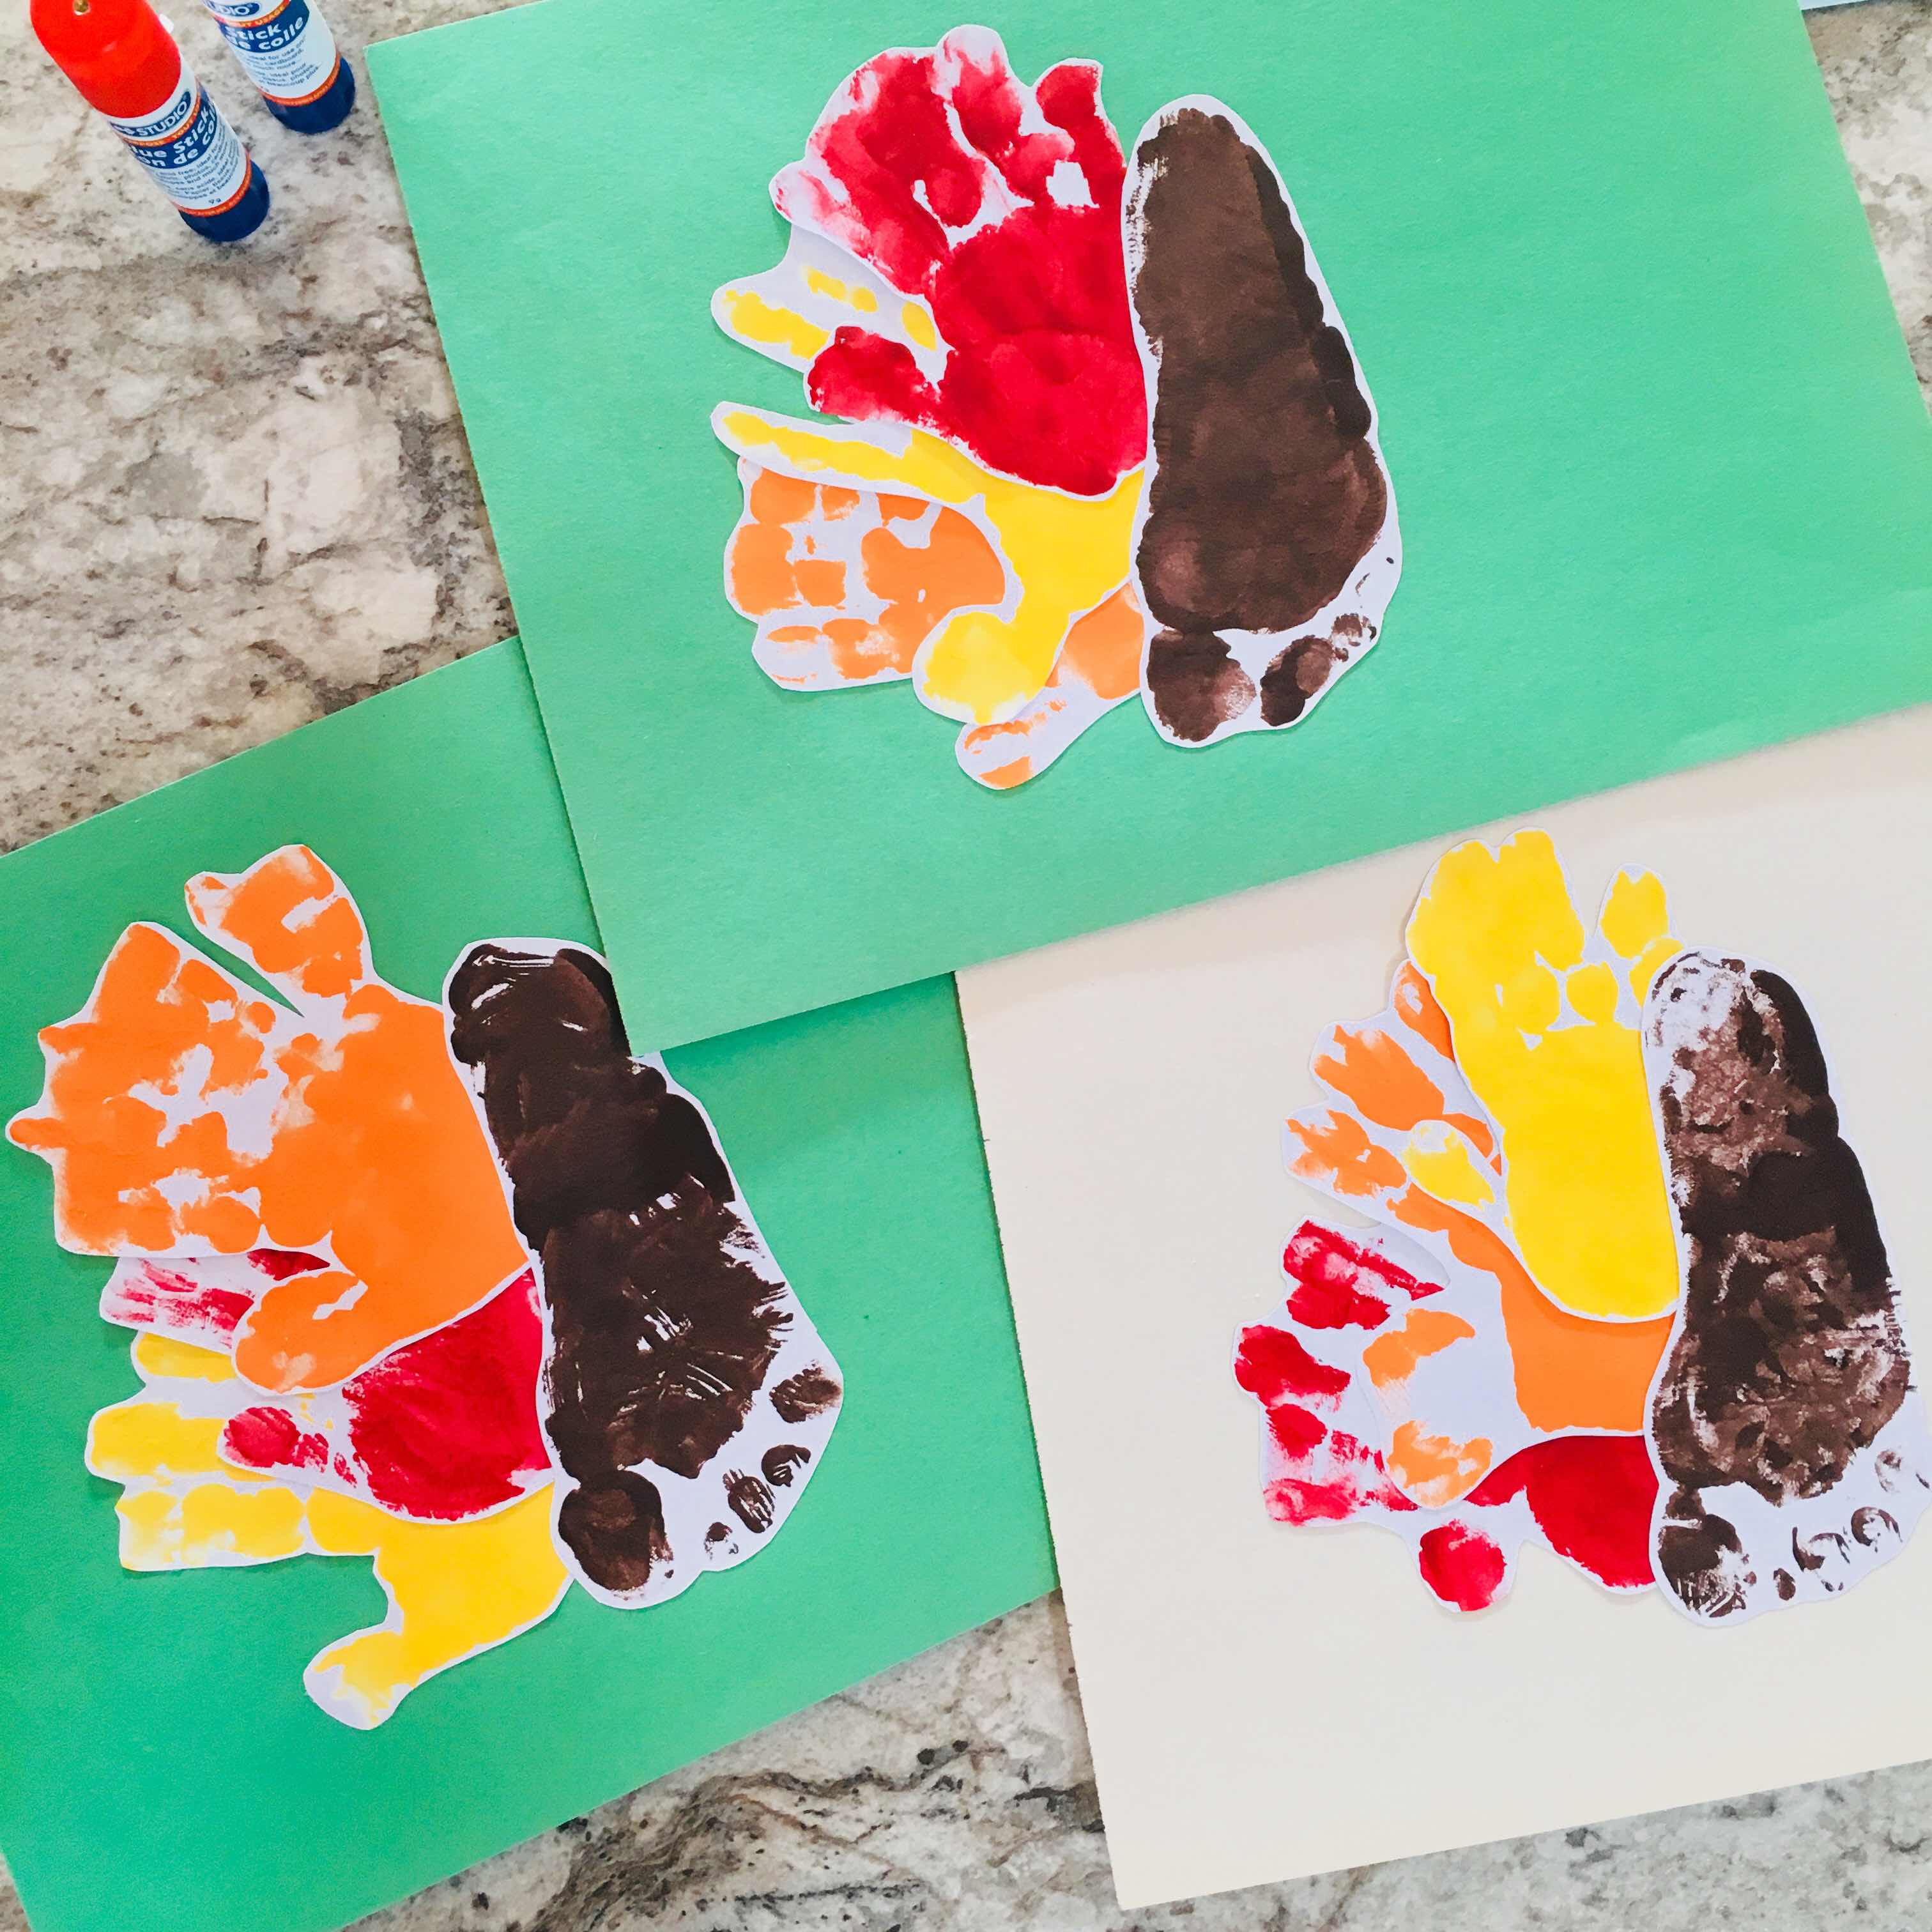
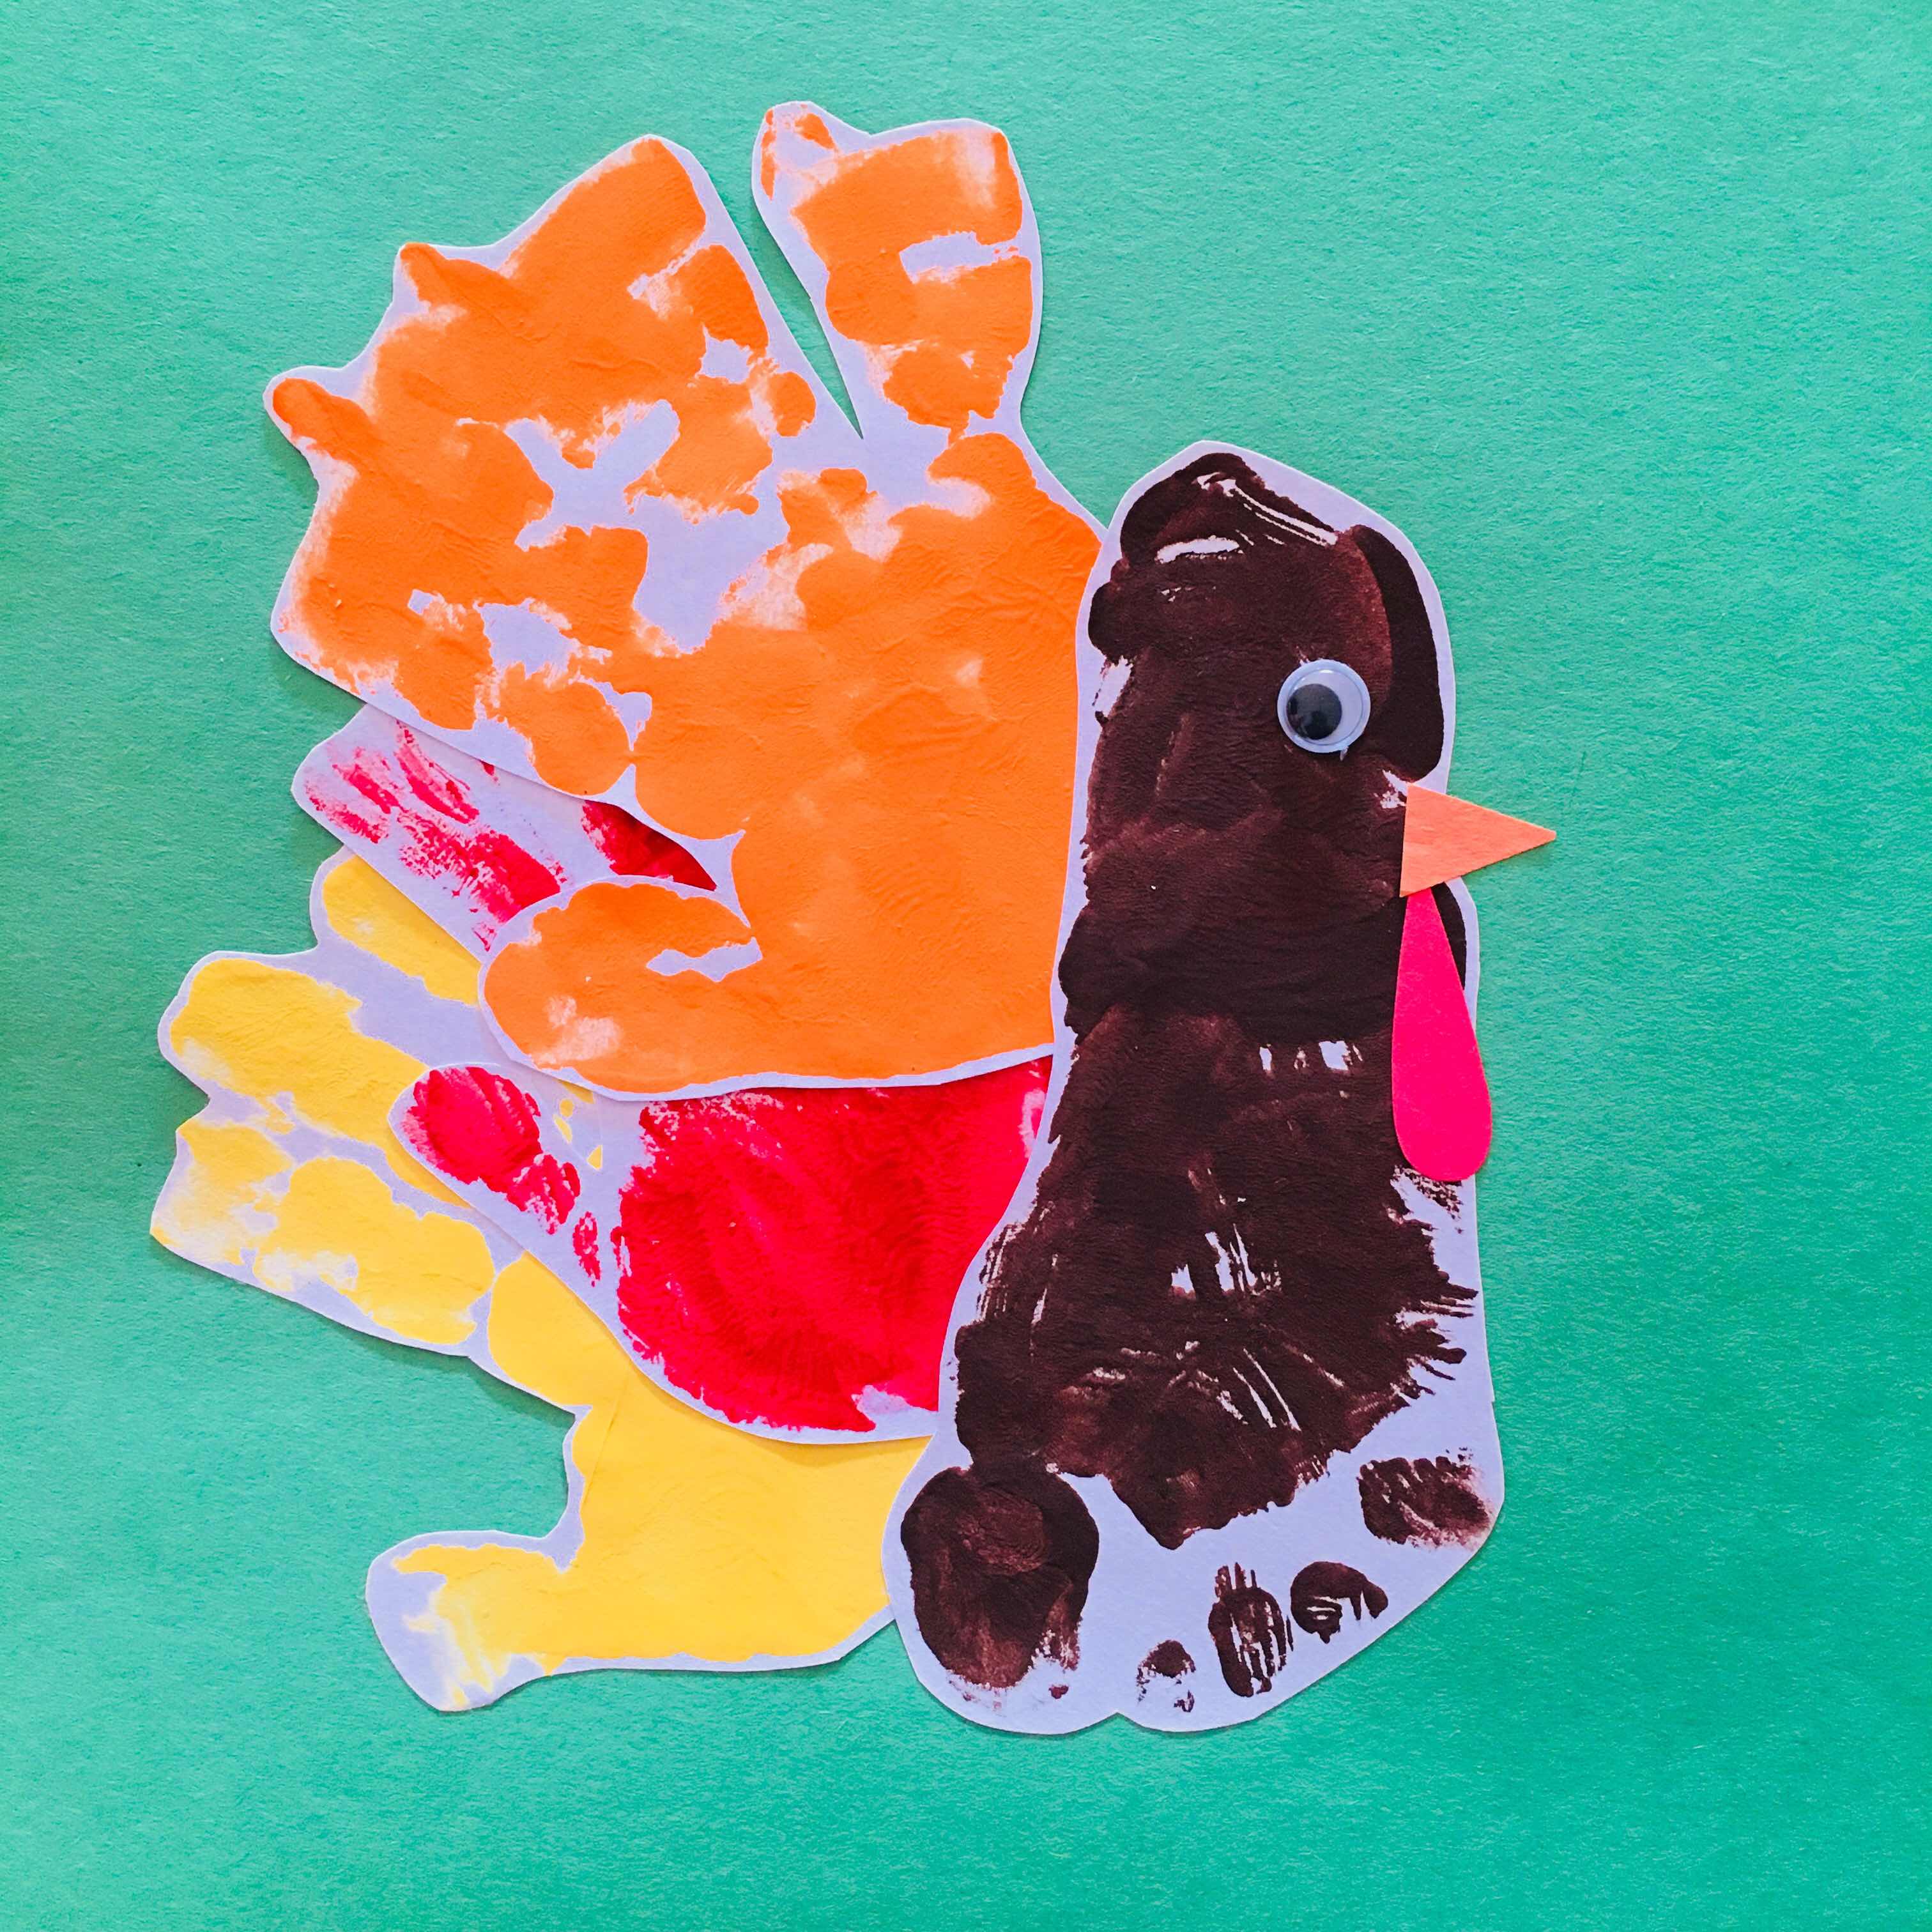
I cut the red and orange pieces to finish the turkeys and we follows the same process with Little Dude applying the glue and me sticking them on. Lastly, we put the eyes on the turkeys.
Step 6 – Cut Out & Personalize

I did this last step on my own since Little Dude doesn’t cut or print yet. Truth be told we made these in September but I dated them for October to match Canadian Thanksgiving 😉

He was very proud to give a turkey to each set of grandparents for Thanksgiving! And, of course, they were all very happy to receive a hand-made craft with Little Dude’s hand prints and foot print as the star of the show.
Happy crafting everyone!
PIN FOR LATER


No Comments